How to Start a Group
Create a new content-sharing Group on Plucky Wire, configure its public details, and bring your first partner newsrooms into it. The form itself takes about ten minutes, and every setting can be changed later.
Joining an existing Group instead?
If your newsroom wants to participate in a Group that already exists, see How to Join a Group. This page is for people setting up a new Group.
Before You Begin
You will need:
- A verified Plucky Wire account (see Sign Up with Email)
- The basic details for your collaborative: a name, a one-paragraph description, and a contact email address
Note
You don't need to belong to an Outlet — a news organization on Plucky Wire — to start a Group. If you already belong to a verified Outlet, it will be added to your new Group automatically. The moment you create a Group, you become its Owner with full administrative access.
Instructions
Open the Create-a-Group Form
-
Log in at https://wire.pluckyworks.org.
-
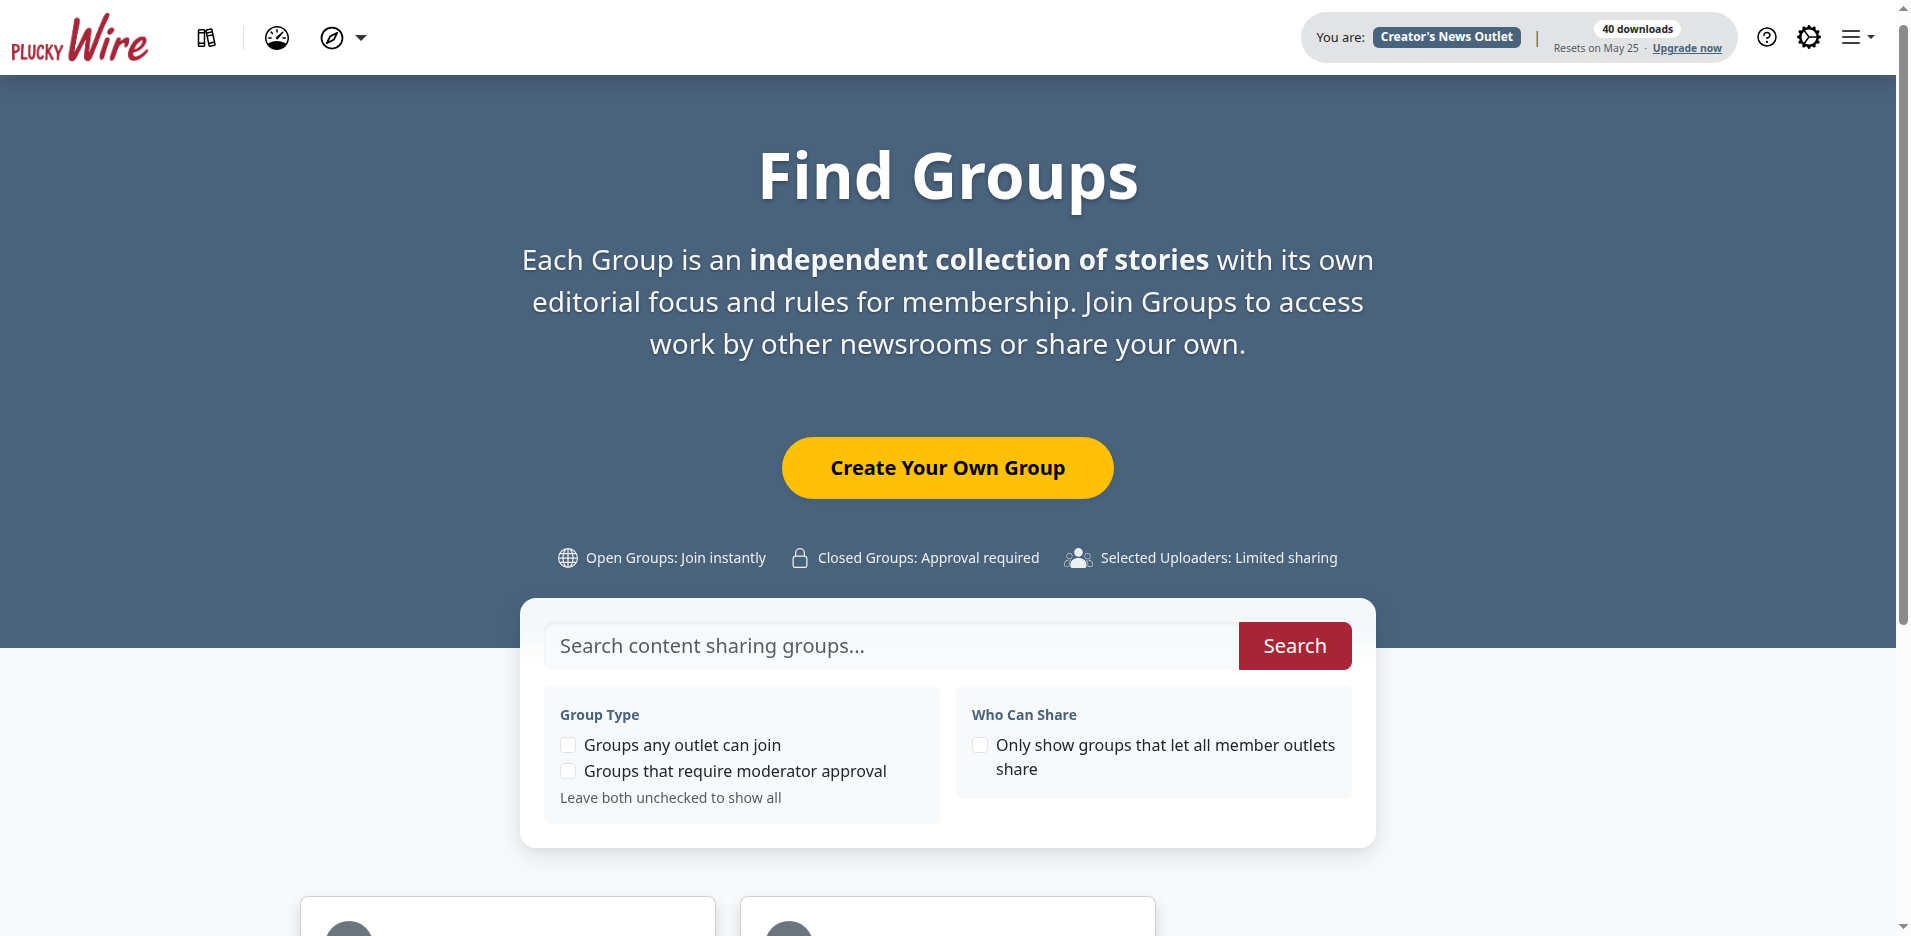
From the dashboard, click Explore Groups in the Quick Links row. This opens the Explore Groups page — Plucky Wire's directory of publicly listed Groups.
-
Click Create Your Own Group.
Fill Out the Group Details
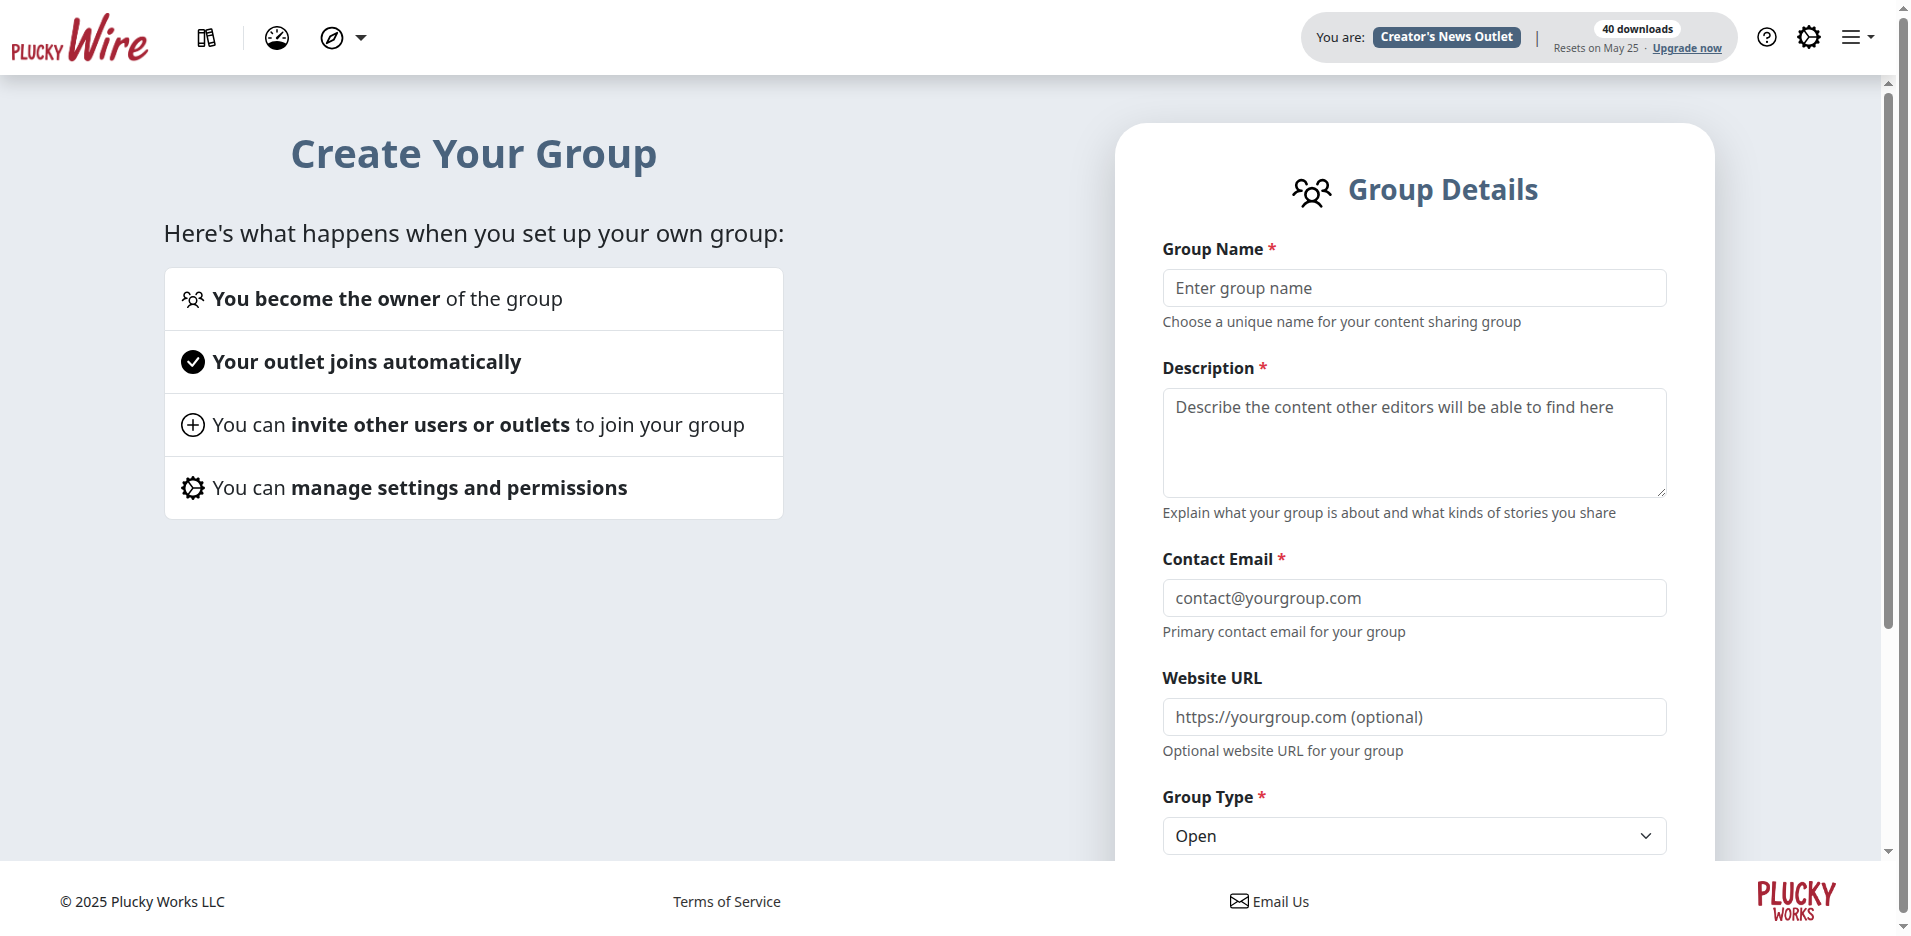
| Field | Required? | What to enter |
|---|---|---|
| Group Name | Required | The public name of your collaborative, up to 100 characters. Partner newsrooms see this when they search for your Group. |
| Description | Required | A short paragraph describing what your Group is, who it serves, and what kinds of stories you share. Partners read this when deciding whether to join. |
| Contact Email | Required | The address Plucky Wire uses to reach you, and the address shown on your Group's public profile. A shared inbox (e.g. wire@yourcollaborative.org) is a good choice if more than one person will be administering the Group. |
| Website URL | Optional | A link to your collaborative's website, if you have one. Shown on your Group's public profile. |
| Group Type | Optional | Choose Open (any verified newsroom can join immediately) or Closed (newsrooms must apply, and you approve each request from the Membership Requests page). If you're not sure, choose Closed — you can switch later from your Group settings. |
| Public Listing | Optional | Check to list your Group in Plucky Wire's public directory, where any signed-in user can find it from the Explore page. Leave unchecked to keep your Group invite-only — partner newsrooms will need a direct signup link to join. |
Submit the Form
-
Review your entries.
-
Click Create Group.
-
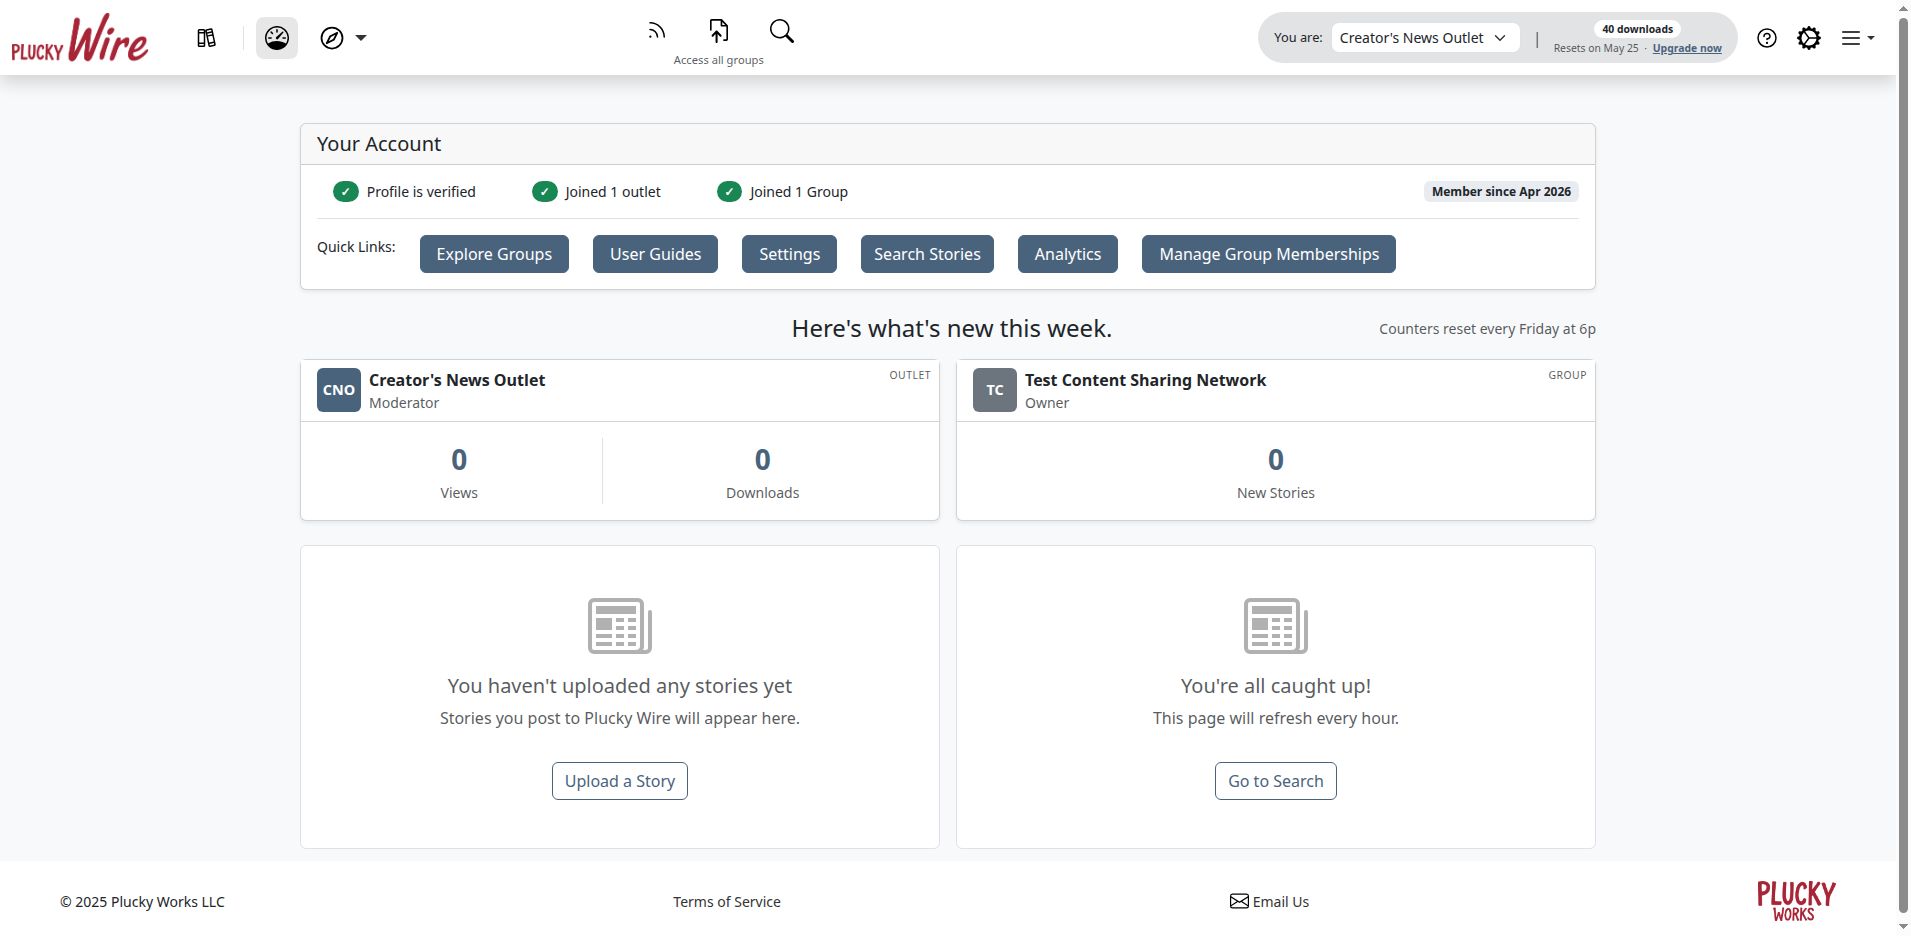
You'll be redirected to your dashboard. Your new Group appears as a tile labelled with your role (Owner), and the Joined 1 Group indicator at the top confirms the Group was created successfully.
What Happens Next
You become the Owner of the new Group, with full administrative access. No one else can see or join your Group yet — you're the only member, and there are no Outlets in it, unless you already belonged to a verified Outlet, in which case it was added automatically.
If you chose Open as the Group Type and checked Public Listing, your Group is immediately discoverable from the Explore Groups page, and any verified newsroom can join without your approval. Otherwise, your Group remains invisible until you bring partners in yourself.
Newly created Outlets are verified by Plucky Wire staff, which typically takes 1–2 business days. Until verification finishes, those Outlets can join your Group but can't upload stories.
Next Steps
Two things need to happen before partner newsrooms can share stories through your Group: at least one content license, and at least one partner Outlet.
Configure your Group's first settings
- Manage content licenses — Decide what terms apply to stories shared in your Group. Set at least one before partners can download.
- Configure Group settings — The rest of the Group-wide preferences
- Set up email digests — Keep members engaged once stories start flowing
Invite partner newsrooms
- Add a partner Outlet directly — Fastest path when you already have an explicit agreement with the partner. The newsroom gets access the moment the Outlet is verified.
- Generate a signup link — A single link multiple newsrooms can use to register their own Outlet on their own schedule. Good for launch announcements and kickoff meetings.
- Invite individual editors and reporters by email — Use this when you want a specific journalist to be a Moderator or Owner of the Group itself, not just a member of a partner Outlet.
Troubleshooting
-
I don't see a "Create Your Own Group" button on the Explore Groups page: The button only appears for users with a verified email address. If you've just signed up, check your inbox for the verification email and click the link inside. If you've already verified, log out and back in.
-
The form rejects my Group name: Group names are limited to 100 characters. Shorten the name or move detail into the Description field.
-
My existing Outlet didn't get added to the new Group: Outlets are added automatically only if they're already verified by Plucky Wire staff. If your Outlet is still pending, it will need to be added to the Group manually after verification — see How to Manage Outlets.
-
A partner newsroom can't find my Group: If you left Public Listing unchecked, your Group won't appear in the public directory. Either turn on Public Listing in your Group settings, or send the partner a signup link.
-
Still stuck? Email support@pluckyworks.org, or ask any other Owner of your Group if there is one.